Remember those iconic 90s camping trips, illuminated by the soft, energy-efficient glow of a compact fluorescent lamp (CFL) lantern? These trusty companions, while durable, aren't immune to the wear and tear of countless nights under the stars. A flickering bulb, a loose connection, or a cracked casing can quickly dim the nostalgic ambiance. But fear not, fellow adventurers! Many of these lanterns are surprisingly repairable, allowing you to breathe new life into a cherished piece of camping history and avoid unnecessary waste. Their simple design often means a straightforward fix, saving you money and reducing your environmental impact.
This guide will walk you through the process of diagnosing and resolving common issues with your 90s-style CFL camping lantern, empowering you to get back to enjoying those classic camping vibes. Let's dive into the step-by-step process of getting your lantern shining bright once more.
Preparation and Safety Guidelines
- CFL camping lantern
- New CFL tubes (warm color)
- New lead-acid battery
- Screwdriver
- Crimping connectors
- Multimeter (optional)
- Always disconnect the CFL lantern from its power source (batteries) before attempting any repairs.
- CFL bulbs contain mercury; handle broken bulbs with extreme care, using gloves and avoiding direct contact. Dispose of broken bulbs according to local regulations.
- Do not attempt repairs if you are uncomfortable working with electronics. Consult a qualified electrician if needed.
Step-by-Step Instructions
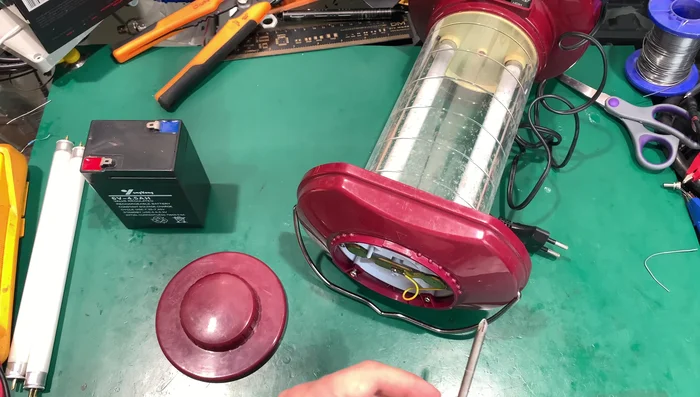
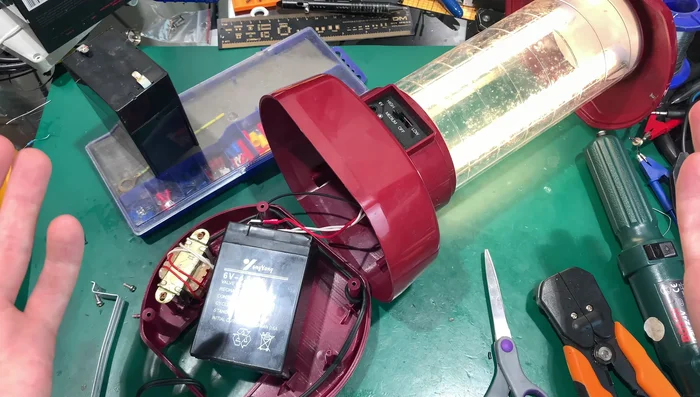
Preparation and Disassembly
- Disassemble the lantern to access the CFL tubes and battery.

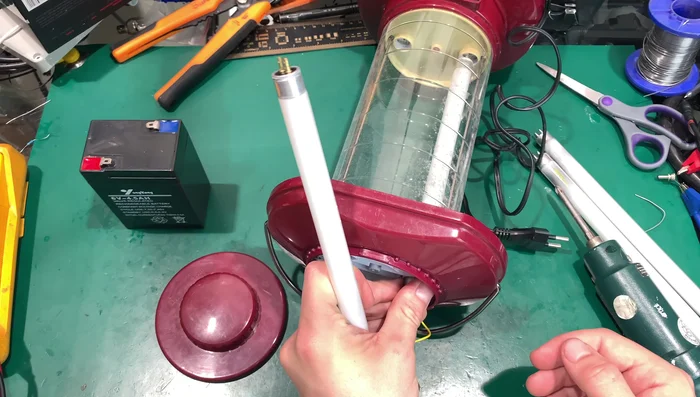
Preparation and Disassembly Tube Replacement
- Carefully remove the old CFL tubes.
- Install the new warm-colored CFL tubes, ensuring proper seating.
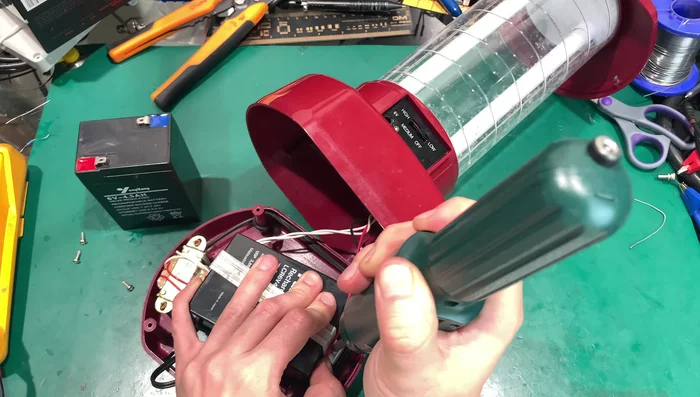
Tube Replacement Battery Replacement
- Replace the old lead-acid battery with a new one. Consider adding quick connectors to the battery terminals for easier future replacement.
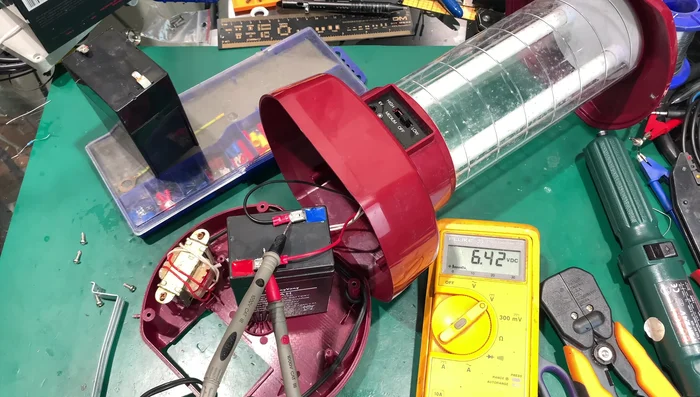
Battery Replacement Reassembly and Testing
- Reassemble the lantern.
- Connect the lantern to a power source to verify charging voltage and functionality.
Reassembly and Testing

Read more: Restore Your Coleman 275 Lantern: A Comprehensive Guide
Tips
- If a screw is lost during disassembly, find a suitable replacement.
- Using quick connectors on the battery will make future battery replacements easier.