Discover the rewarding art of DIY pillar candle making with this beginner-friendly guide. Learn how to transform simple materials into beautiful, personalized candles that will fill your home with warmth and fragrance. This step-by-step tutorial covers everything from gathering essential supplies like wax, wicks, and molds, to mastering crucial techniques such as wick preparation, accurate wax measurement, and proper mold release. We'll guide you through each stage, ensuring a successful and enjoyable candle-making experience, even if you're a complete novice.Whether you're crafting candles as a relaxing hobby or creating unique gifts, this guide provides the knowledge and confidence you need to achieve professional-looking results. We'll explore essential tips for achieving a clean burn, addressing common issues like wax shrinkage and air bubbles. Prepare to unleash your creativity as you experiment with different scents, colors, and mold designs to create candles that perfectly reflect your personal style and preferences. Let's embark on this illuminating journey together!
Pros And Cons
- Relatively easy to make with basic supplies.
- Can be difficult to remove from the mold without mold release.
- Paraffin wax shrinks as it cools, requiring a top-up pour.
Read more: Coleman Northstar Candle Lantern Review: A Bright and Safe Light Source for Camping
Essential Supplies for Pillar Candle Making
Creating your own pillar candles is a rewarding experience. Before you begin, gather the necessary materials. You'll need wax (paraffin or a soy blend – soy wax alone is too soft for pillars), wicks (choose the appropriate size based on your mold), a pillar candle mold (various sizes are available), and mold release spray (essential for easy removal).
Don't forget a double boiler or heat-safe pot and thermometer for melting the wax. A wick sticker or putty is also important to secure the wick at the bottom of the mold. Finally, you will need a fragrance oil if you wish to add a scent to your candle.
Preparing the Mold and Wick
Proper wick preparation is crucial for a well-burning candle. For this project, a pre-tabbed wick is used, ensuring a secure placement. Trim off the tab and feed the wick through the bottom of the mold, leaving about a quarter-inch sticking out the top. Secure the wick firmly with wick putty or a wick sticker to create a seal.
Spray the inside of the mold with mold release to facilitate easy removal after the candle has set. This is a key step to avoid damaging your beautiful creation.
Melting the Wax and Pouring the Candle
Accurate wax measurement is important to avoid waste. Use a scale to determine the volume of your mold by filling it with water and weighing it. Add an additional 10% to account for wax shrinkage. Melt your chosen wax in a double boiler or heat-safe pot, carefully monitoring the temperature.
Once melted, add your fragrance oil (if using) and stir gently. Let the wax cool slightly before pouring slowly and steadily into your prepared mold, filling it to the brim. Leave it to cool and solidify completely.
Finishing Touches and Unmolding
After the candle has fully cooled, you'll notice some shrinkage. Don't worry, this is normal, especially with paraffin wax. To address this, create relief holes using a metal rod to release any air bubbles or pressure. Reheat the leftover wax and carefully pour it over the top to fill any gaps.
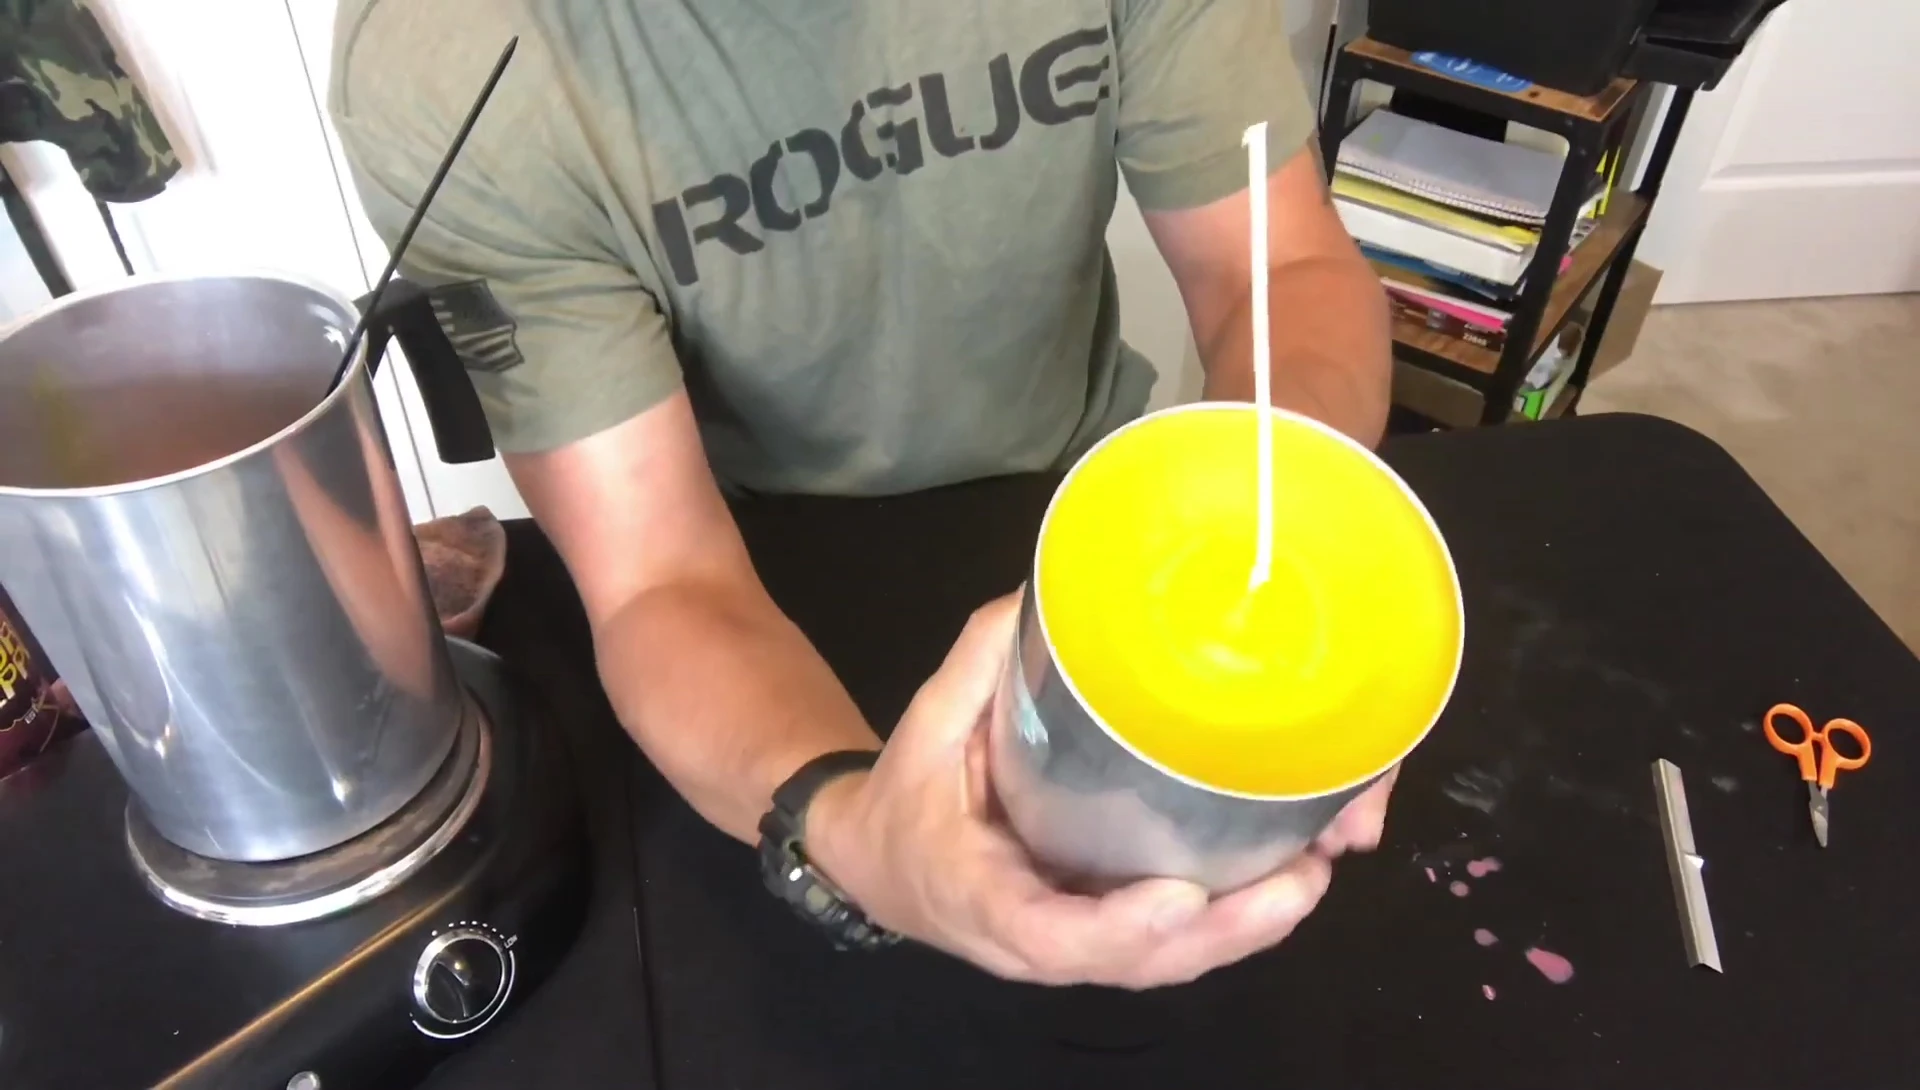
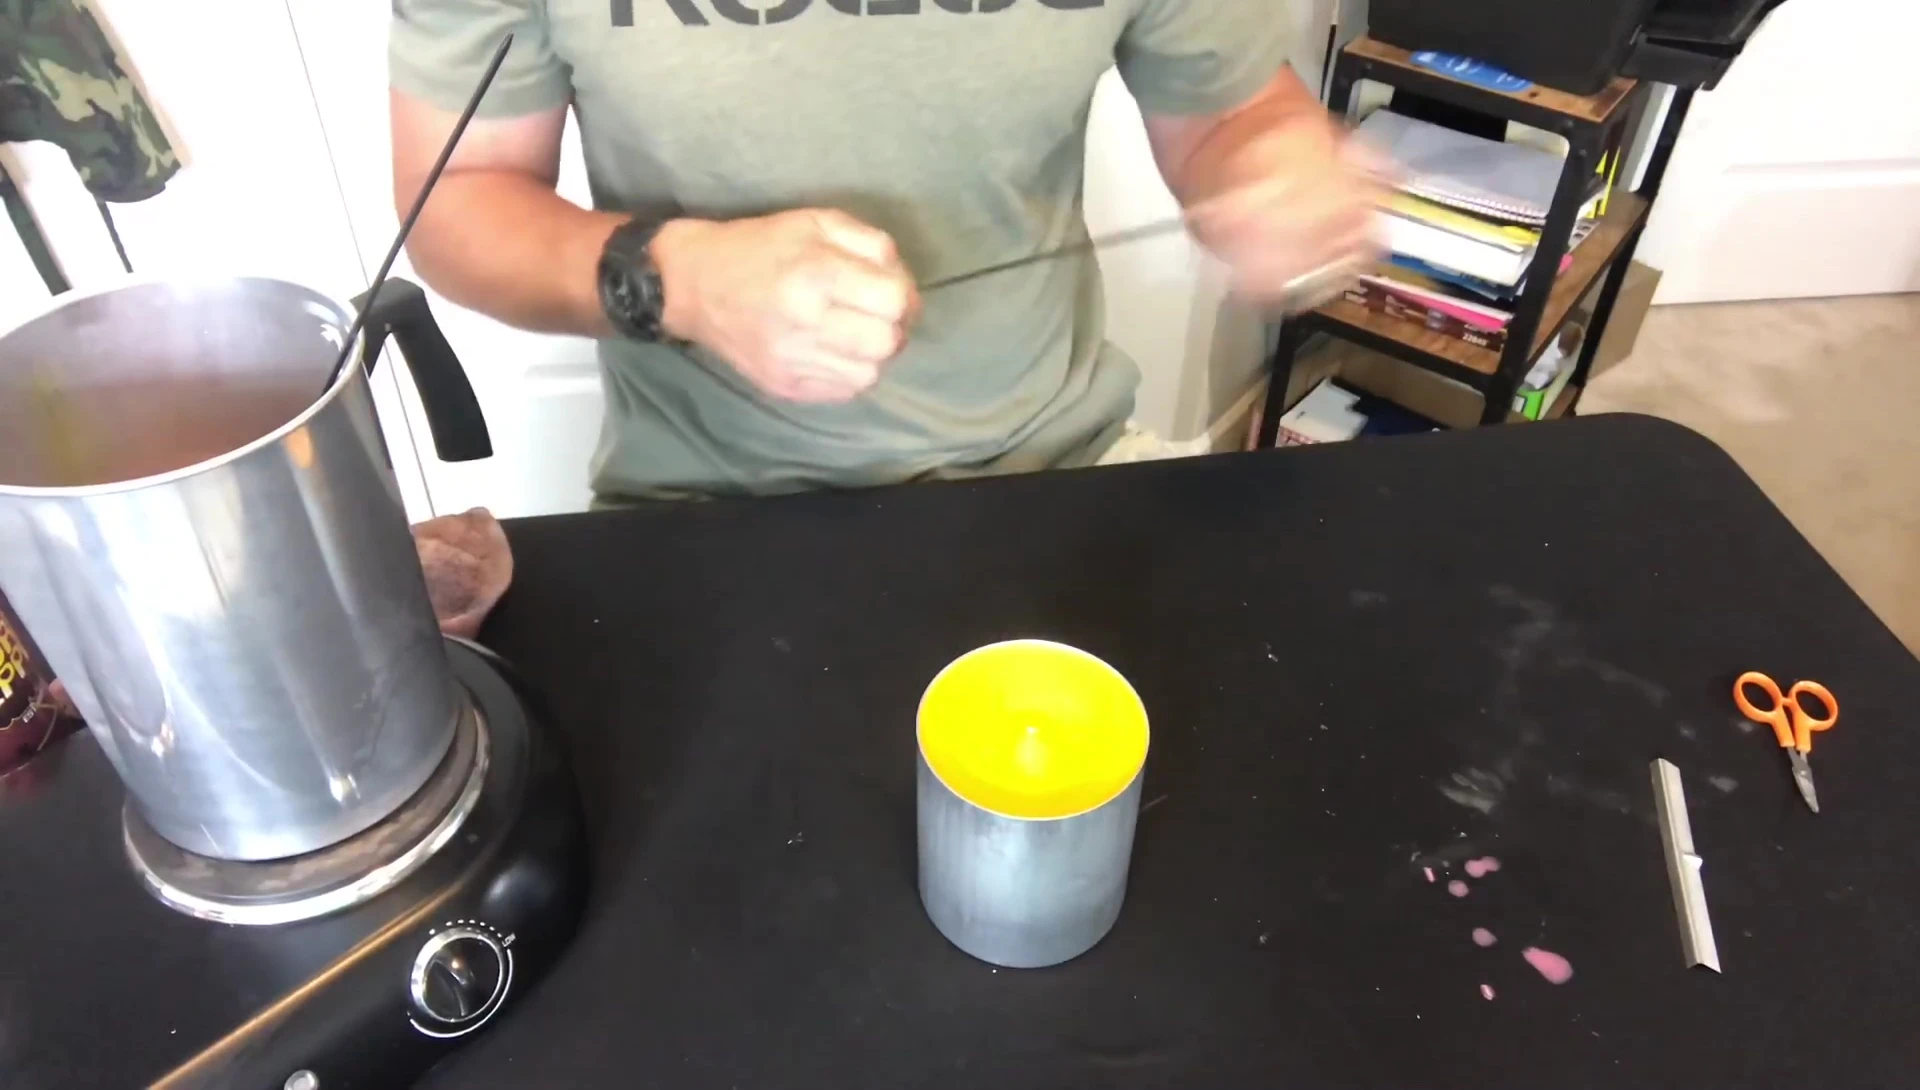
Once completely cool, remove the wick bar and trim the wick at the bottom. Gently remove the candle from the mold. A slight chill in the refrigerator (not freezer) may help if the candle is stubborn. This step reveals your finished pillar candle.
Conclusion
Making pillar candles at home is a surprisingly simple process, once you have the right supplies and techniques. Remember to pay close attention to wax type, wick size, and mold release for optimal results. With a bit of patience and care, you can create beautiful, personalized candles for your home or as gifts.
This guide provides a solid foundation for candle making beginners. Experiment with different scents, colors, and mold designs to personalize your creations. Enjoy the creative process and the wonderful ambiance your handmade candles will bring.