Staying warm in a camping tent during chilly nights is crucial for a comfortable and enjoyable outdoor experience. While traditional camping stoves offer some warmth, they can be inefficient, consume fuel rapidly, and potentially pose a fire risk. For a truly effective and uniquely Finnish approach to tent heating, consider the power of a carefully constructed log torch. This method, passed down through generations, offers a sustainable and surprisingly efficient way to generate significant heat within your tent's confines, keeping you cozy all night long.
This alternative heating method leverages the slow-burning properties of wood, providing a long-lasting and reliable heat source. Forget worrying about running out of fuel or dangerous flames; the Finnish log torch offers a safer, more sustainable alternative. In the following steps, we will guide you through the process of building and safely using this ingenious heating solution, ensuring a warm and memorable camping trip.
Safety Guidelines
- Never leave the fire unattended. Always have a responsible adult supervising the log torch at all times.
- Ensure the log torch is placed on a non-flammable, stable surface far from the tent's fabric. Maintain a safe distance to prevent accidental ignition.
- Have a readily available fire extinguisher or bucket of water nearby in case of emergency.
Methods: Heating a Camping Tent with a Finnish Log Torch and Metal Pipe
Tools Needed
- Metal pipe (curved steel pipe is recommended)
- Finnish log torch
- Pipe thermometer
- Wood (dry segments of a fir tree are ideal)
- Axe
- Clamp/Steel wire (for securing the pipe)
- Nails (for securing the legs of the log torch)
Step-by-Step Instructions
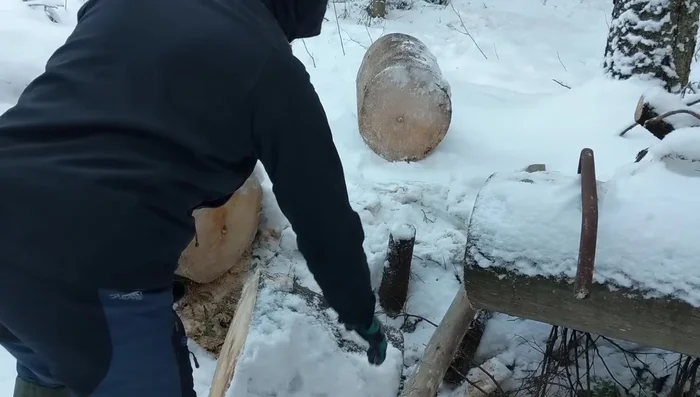
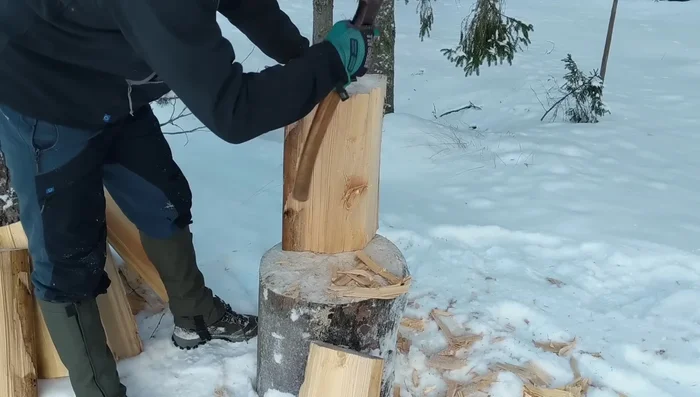
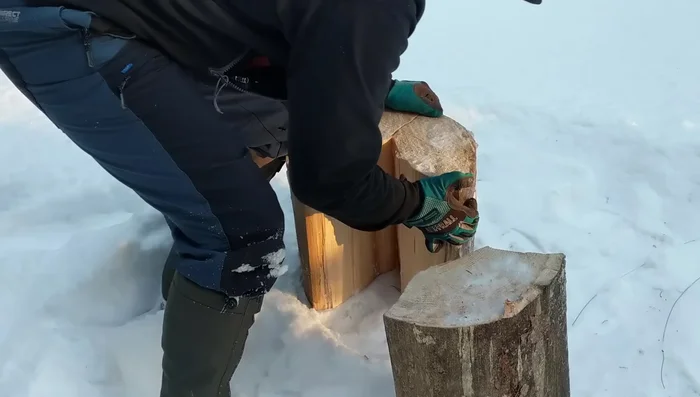
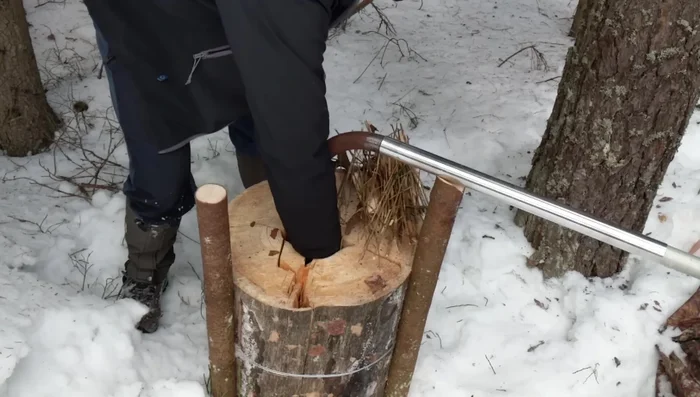
Prepare the Finnish Log Torch
- Prepare a Finnish log torch. Chop a segment of wood into three or four large pieces and remove the cool portion to create a channel for the pipe.

Prepare the Finnish Log Torch Assemble the Heating System
- Securely insert the curved metal pipe into the channel of the log torch.
- Clamp the pipe and torch assembly using steel wire for stability. Attach legs to the torch for better airflow and stability.
Assemble the Heating System Set up the Camping Tent
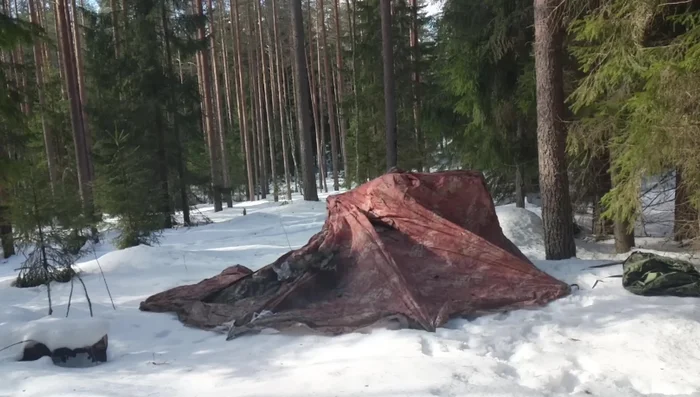
- Set up the camping tent. Ensure good ventilation.
Set up the Camping Tent Position and Light the Torch
- Position the log torch outside the tent, ensuring it is stable and won’t fall onto the tent. Clear a small spot from snow around the base of the torch.
- Light the log torch. Use dry branches and wood chips to start the fire.
Position and Light the Torch Connect the Pipe to the Tent
- Run the metal pipe from the log torch into the tent through a tent entrance. The fresh air should enter the pipe below the level of the log torch.
Connect the Pipe to the Tent Heat the Tent
- Allow sufficient time for the tent to heat up (at least an hour).
Heat the Tent


Tips
- Use dry wood for the log torch to maximize burning time.
- Ensure the metal pipe is securely attached to prevent it from falling.
- Position the log torch a safe distance from the tent to prevent fire hazards.